
Why the Adjuster Appointment Matters So Much in Colorado
Colorado sees more hail activity than almost anywhere else in the country, and that means a lot of homeowners across the Denver Metro and Northern Colorado region end up filing a storm damage claim at some point. The adjuster appointment is usually the single most important meeting in that whole process. It's where the insurance company forms its first real opinion of how much damage exists and what it will cost to fix.
Homeowners who go into that meeting without preparation, or without their roofer present, often end up with a lower initial estimate than the damage actually calls for. That's not because adjusters are trying to shortchange anyone. It's because they're covering a large territory and moving fast, and they rely heavily on what gets pointed out to them in the moment. Preparation changes what they see.
What the Adjuster Is Actually Looking For
An adjuster's job is to verify that damage exists, document it, and produce a number the insurance company will pay out against. They aren't there to argue with you, and they aren't there to do a full inspection the way a roofing contractor would. They're working from a checklist and a limited amount of time on site.
The Test Square
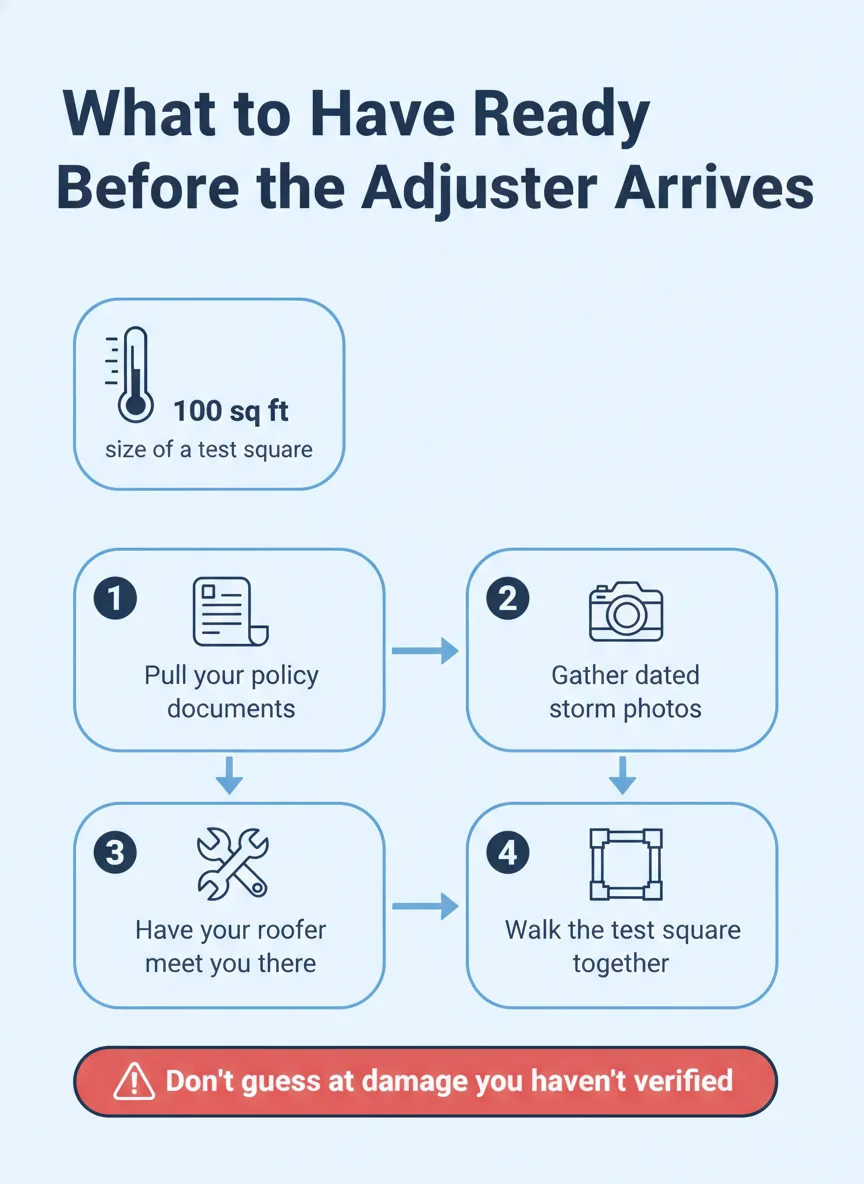
Most adjusters use a method called a test square, a marked-off sample area of roughly 100 square feet, to estimate damage across the whole roof. They count impact marks, bruising, or granule loss inside that square and extrapolate from there. Where that square gets placed has a real effect on the final number.
A roofer who's walked plenty of these inspections knows to ask that the square be placed somewhere representative of the roof's actual condition, not the one slope that happened to take the least wind. That's one of the clearest reasons to have your roofer on site rather than handling the appointment alone.
Photos and Documentation
Adjusters photograph everything they find as backup for their report. Soft spots, cracked flashing, displaced material, and granule buildup in the gutters all get documented. The more clearly damage is photographed and labeled, the less room there is for a dispute later if the claim gets reviewed again.
This is also where your own photos matter. If you noticed a leak or missing material before the adjuster arrived and you got pictures with a date on them, that documentation backs up the timeline and strengthens the overall claim.
| Situation | Without your roofer present | With your roofer present |
|---|---|---|
| Test square placement | Adjuster chooses it alone | Roofer can request a representative spot |
| Technical damage language | Homeowner describes it informally | Roofer uses terms the adjuster's training recognizes |
| Estimate gaps | Homeowner unsure how to respond | Roofer can request a supplement with documentation |
| Access to hard-to-see areas | May get skipped | Roofer can point out less visible damage |
What Your Policy and Paperwork Should Cover
Before the adjuster shows up, it helps to have your policy's declarations page handy. That page spells out your deductible, your coverage limits, and whether you have replacement cost or actual cash value coverage, all of which affect how the claim gets paid out.
It also helps to have a simple written timeline: when the storm happened, when you first noticed an issue, and any temporary repairs you made in the meantime, like tarping an active leak. That timeline gives the adjuster context and shows you acted responsibly to prevent further damage.
Step-by-Step: Getting Ready for the Adjuster Visit
Most of the preparation for an adjuster appointment happens in the days before it, not the morning of. Here's the order that tends to produce the smoothest meeting.
- Schedule your roofer first: Get your roofer's storm damage and insurance team scheduled to be on site at the same time as the adjuster, not after.
- Pull your policy documents: Locate your declarations page and know your deductible and coverage type before the appointment.
- Gather dated photos: Collect any photos you took of the storm, interior leaks, or visible exterior damage, with dates if possible.
- Write a short timeline: Note when the storm happened and when you first noticed damage or a leak inside the home.
- Let your roofer walk the roof: Allow your roofer and the adjuster to do the physical walkthrough together while you stay available for questions.
- Ask about the test square location: Confirm where the sample area was placed and whether it reflects the roof's overall condition.
- Request a copy of the report: Ask the adjuster for a copy of their findings before they leave so your roofer can compare it to their own assessment.
Reading the Result: What a Gap Between Estimates Means
It's common for the adjuster's estimate and your roofer's estimate to differ, sometimes by quite a bit. That gap doesn't mean your claim is being denied or that something went wrong. It usually just means the two inspections caught different amounts of damage, or priced materials and labor differently.
When the Gap Is Small
A small difference between estimates often gets resolved with a short phone call or a follow-up document from your roofer clarifying scope of work. These adjustments happen routinely and rarely require much back and forth.
Your roofer can walk you through exactly which line items differ and why, so you understand what's being requested rather than just seeing two different totals with no explanation.
When the Gap Is Large
A larger gap usually points to a disagreement over the scope of damage, not just pricing. This is where a formal supplement request comes in, with additional photos, measurements, or documentation submitted to support a revised number.
Larger gaps take longer to resolve, but having a roofer who documented the damage thoroughly at the first appointment makes the supplement process far more straightforward than starting from scratch.
What You Can Handle Yourself and What Needs a Pro
Homeowners can absolutely handle the paperwork side of this process: pulling the policy, organizing photos, writing down a timeline, and asking good questions during the appointment. None of that requires a license or special training, just a bit of organization before the adjuster shows up.
The physical inspection itself is a different story. Climbing onto a roof to assess damage isn't something most homeowners should attempt, both for safety reasons and because untrained eyes miss things that matter to a claim. A roof inspection from a trained crew documents damage in a way that holds up when the claim gets reviewed.
Negotiating a supplement or pushing back on an estimate gap also benefits from experience. A roofer who has been through plenty of these claims knows which documentation moves an adjuster and which arguments go nowhere, and that knowledge is hard to replace with a weekend of research.
Getting the Roof You're Owed
The adjuster meeting sets the tone for the rest of your claim, so a little preparation goes a long way. If you're in the Denver Metro or Northern Colorado region and you've got a storm damage claim coming up, our storm damage and insurance team can walk the roof with your adjuster and handle the documentation that backs up your claim. For more on what happens after the adjuster visit, see our roof insurance claim timeline guide covering the steps from storm to new roof.
Whether you're in Westminster or anywhere else across the region, Virtuous Roofing and Exteriors shows up for the adjuster meeting prepared to document damage clearly and push for the roof your policy actually covers.
Frequently asked questions
Should I be on the roof with the adjuster during the inspection?
You don't need to climb onto the roof yourself, but it helps a great deal to have your roofer there with the adjuster. Your roofer knows what to point out and can speak to damage in terms the adjuster's own training recognizes.
What does an adjuster actually measure during a storm damage inspection?
The adjuster typically marks off a small sample area called a test square and counts impact marks or damaged spots inside it. That sample gets used to estimate damage across the whole roof, so where it's placed matters.
What should I bring to the adjuster meeting?
Bring your policy declarations page, any dated photos of the storm or the damage, and notes on when you first noticed a problem. Having dates and documentation ready keeps the conversation factual instead of guesswork.
What happens if my roofer's estimate doesn't match the adjuster's?
A gap between estimates is common, and it doesn't mean the claim is over. Your roofer can request a supplement with additional photos and documentation to support the difference, and many claims get revised after that follow-up.
Can I say anything that hurts my claim during the adjuster visit?
Yes, speculating about causes or ages you're not certain of can create confusion in the adjuster's report. It's safer to stick to what you know firsthand and let your roofer handle the technical talk.