
When a storm opens up your roof in Colorado
Colorado throws a lot at a roof in a short window. A summer hailstorm can strip shingles in minutes, a spring gust can snap a dead branch loose, and before you know it there's a hole letting water straight into the attic or ceiling below. The moment you notice it, whether it's a drip on the carpet or a visible gap when you step outside, the clock starts running on how much damage spreads through the house.
The first 24 hours matter more than people think. Water doesn't wait for a convenient time to find insulation, drywall, and wiring. A fast, calm response in those first hours is what keeps a roof problem from becoming a ceiling, flooring, and mold problem too. None of what follows requires special tools or training, just a clear head and a phone call.
Why speed matters more than perfection right now
You don't need to fix anything yourself in the first 24 hours. What you need to do is limit how much damage a hole in the roof causes while it's open, and get the right people headed your way. Every extra hour of exposure means more water soaking into framing and insulation that otherwise would have stayed dry.
Inside the house
If water is actively dripping, your first job is protecting what's underneath it, not the roof itself. Move furniture, electronics, and anything irreplaceable out from under the leak. A wet ceiling can sag and eventually let go, so keep people clear of that spot rather than standing under it to watch.
Set a bucket, trash bin, or anything with volume directly under the drip to catch water before it spreads across the floor. If the ceiling is visibly bulging with trapped water, a small controlled hole poked with a screwdriver can relieve pressure and direct the water into your container instead of letting it find its own path across the drywall.
Outside the house
From the ground, take a look at what you can see. If a tree limb came down, note where it landed and whether it's still resting on the roof. Do not attempt to move a limb yourself, especially if it's tangled near power lines or sitting on a damaged section that might not hold weight.
Stay off the roof entirely. A deck that's been compromised by impact or water can look solid and still fail the moment someone steps on it, and a wet surface after a storm is especially unforgiving. This is the single most important thing to get right in the first hours, because it's also where people get hurt.
| Situation | What to do | What to avoid |
|---|---|---|
| Active drip inside | Move items, place a bucket, relieve a bulging ceiling | Letting water pool and spread across drywall |
| Visible hole from ground | Photograph it, call a roofer | Climbing up for a closer look |
| Fallen limb on the roof | Note its position, stay clear | Trying to pull or cut it down yourself |
| High wind or rain still active | Wait indoors, keep monitoring from inside | Any tarping attempt in the weather itself |
What a tarp actually does on a damaged roof
A tarp is a temporary waterproof barrier, nothing more. It's stretched and fastened over the opening to stop rain and snowmelt from continuing to get in while a permanent fix is scheduled. It won't restore the structural integrity of a broken deck, and it won't hold up indefinitely in Colorado wind, which is exactly why it's meant to be a bridge, not a destination.
A properly installed tarp is anchored well beyond the edges of the damage, usually wrapped over the ridge or secured to solid framing so wind can't get underneath and peel it loose. That's part of why this isn't a great weekend DIY project. A tarp that lifts in the first gust after it's installed has done nothing but waste the time it took to put it up.
Step-by-step: what to do in the first 24 hours
Here's the order that actually protects your home and your insurance claim at the same time, from the moment you discover the damage to the moment a crew arrives.
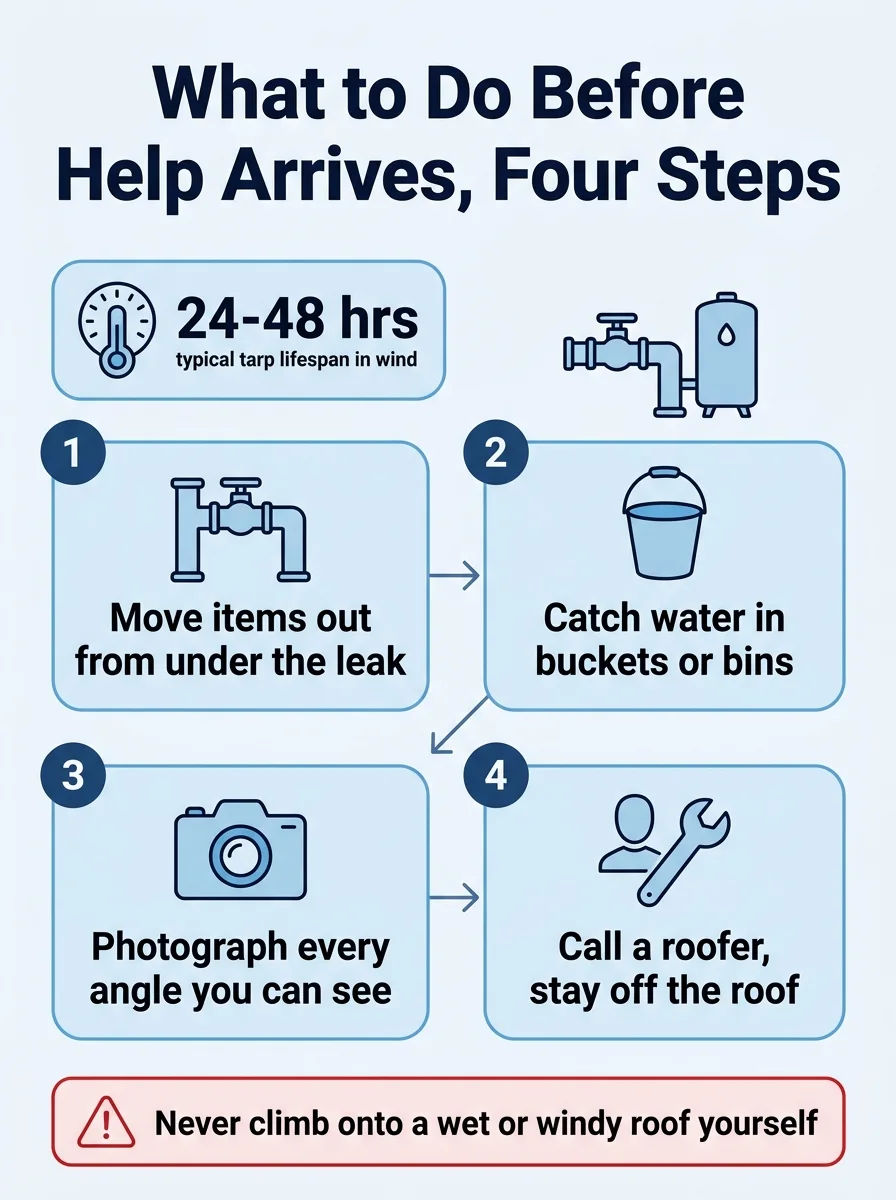
- Protect people first: Keep everyone away from sagging ceilings, standing water near outlets, and the roof itself. Nothing else matters if someone gets hurt.
- Move belongings: Get furniture, rugs, and electronics out from under any active leak before you do anything else.
- Catch and contain water: Place buckets or bins under drips and relieve a bulging ceiling with a small controlled hole if needed.
- Photograph everything: Shoot the exterior damage from the ground, any debris involved, and the interior water damage before anything is moved or covered.
- Call a roofer: Reach out for emergency tarping and repair as soon as it's safe to do so, even if it's after hours.
- Let the crew handle the roof: A trained team tarps the opening properly, anchored against wind, while you stay on the ground.
- Hold onto your documentation: Your photos and notes become the backbone of an insurance claim if the damage warrants one.
What you'll find once the immediate danger passes
Once the tarp is up and the house is no longer taking on water, you've bought yourself time to figure out the real extent of the damage. This is usually when a full assessment makes sense, since what looked like a single hole from the ground can turn out to involve a wider area once someone's actually up there.
Hidden damage beyond the obvious hole
Wind-driven rain travels sideways and can work its way under shingles well beyond the visible opening. A thorough look often finds soaked insulation or weakened decking several feet from where the limb hit or the gust tore through, which is one reason a quick patch job by an inexperienced hand can miss problems that resurface later.
If the damage came from a broader storm event rather than an isolated limb, it's worth reading up on how hail and wind damage typically shows up across a roof, since the same storm that caused your emergency may have caused less obvious damage elsewhere on the same slope.
Deciding on repair versus full replacement
A localized hit, like a single branch strike, is usually a repair. A roof that was already aging or that took damage across multiple sections starts to tip the conversation toward replacement instead, since patching an old roof repeatedly costs more over time than addressing it once. Either way, the tarp buys the time to make that call without more water getting in while you decide.
What you can handle yourself and what needs a pro
Everything inside the house is fair game for a homeowner to handle. Moving items, placing buckets, relieving a bulging ceiling, and taking photographs all require nothing more than common sense and quick action. These steps genuinely limit the damage and cost nothing to do right.
The roof itself is a different story. Tarping requires working at height on an unstable, often wet surface, anchoring material so it survives Colorado wind, and knowing where it's safe to walk on a deck that may have hidden weak spots. This is licensed-pro territory, not because homeowners aren't capable, but because the risk of a fall or a second hole from a misstep is real and the margin for error is thin.
Once the tarp is in place, the follow-up work, whether that's a targeted roof repair or a fuller inspection to scope the damage, is also best left to a crew that does this regularly. They'll know what hidden damage to check for and how to document it in a way that holds up with an insurance adjuster.
Getting through the first day and beyond
The first 24 hours after storm or impact damage are really about containment and documentation, not repair. Protect what's inside, capture clear photos, and get a call in to a roofer as soon as it's safe. Everything after that, from tarping to a full repair plan, goes faster and smoother when those first steps were handled calmly.
If you're dealing with an active leak anywhere in the Westminster area or across the Front Range, Virtuous Roofing and Exteriors can tarp the opening and walk you through what comes next once the immediate threat is handled.
Frequently asked questions
Should I go up on my roof after storm damage?
No, you shouldn't climb onto a roof that's wet, windy, or has visible damage, since a soft or broken deck can give way without warning. Stay on the ground, document what you can see from a window or the yard, and let a trained crew assess and tarp it.
How fast can a tarp be put on a damaged roof?
It depends on the extent of the opening, the pitch, and the weather at the time, but a trained crew moves quickly once they're on site because every hour of exposure lets more water in. Call as soon as it's safe so the work can be scheduled right away.
Does a tarp count as a permanent fix?
No, a tarp is a temporary barrier meant to stop active water intrusion until a proper repair or replacement can happen. It buys time, especially useful if you're also filing an insurance claim, but it isn't designed to hold up for the long haul.
What should I photograph before the tarp goes on?
Photograph the damage from the ground at multiple angles, any debris that caused it like a fallen limb, and the interior damage including ceiling stains or standing water. These photos become important documentation for your insurance claim before anything gets covered or moved.
Will my insurance cover emergency tarping?
Most homeowner policies cover reasonable steps taken to prevent further damage, which is exactly what tarping is, but coverage details vary by policy. Check with your insurance company or ask your roofer for help documenting the work for your claim.